
Introduction
If you are getting started on a Data Science project, this article will be of interest to you!
Before starting a Machine Learning project, it’s crucial to prepare and organise your development environment properly!
In this article, we’ll show you how to set up and prepare your environment in several stages.
a) Settings
Before getting started, it’s important to make a few adjustments to your working environment. This step is an essential prerequisite before tackling the root of the problem.

The first question is which code support you are going to use: there are several solutions for installing Python.
You can use Anaconda, Spyder or any other suitable IDE (or development environment).
Generally speaking, we recommend using Anaconda for several reasons:
- Firstly, Anaconda’s features integrate well into your environment and are very easy to use.
- Secondly, the Anaconda Desktop user interface is relatively easy to learn.
- Finally, Anaconda has a number of packages and libraries that are essential for carrying out the most basic tasks.
| On Windows | On Mac | On Linux | |
|---|---|---|---|
| Python | https://www.python.org/downloads/ | sudo apt-get install python | |
| Spyder | https://docs.spyder-ide.org/3/installation.html | sudo apt-get install spyder | |
b) Virtual environment
Once python has been installed, it is important to create a virtual environment.
What for?
It is important to ensure that only the packages you are using are installed in your environment. The virtual environment allows the Python interpreter to integrate installed libraries and scripts in isolation.
Virtualenv (venv) is one of the most widely used tools for this. In most versions of Anaconda, it is pre-integrated. If not, you will need to download it before creating a new environment in the project folder.

The benefits
You can create and change virtual environments as often as you like. Each of them can have different libraries and associated packages.
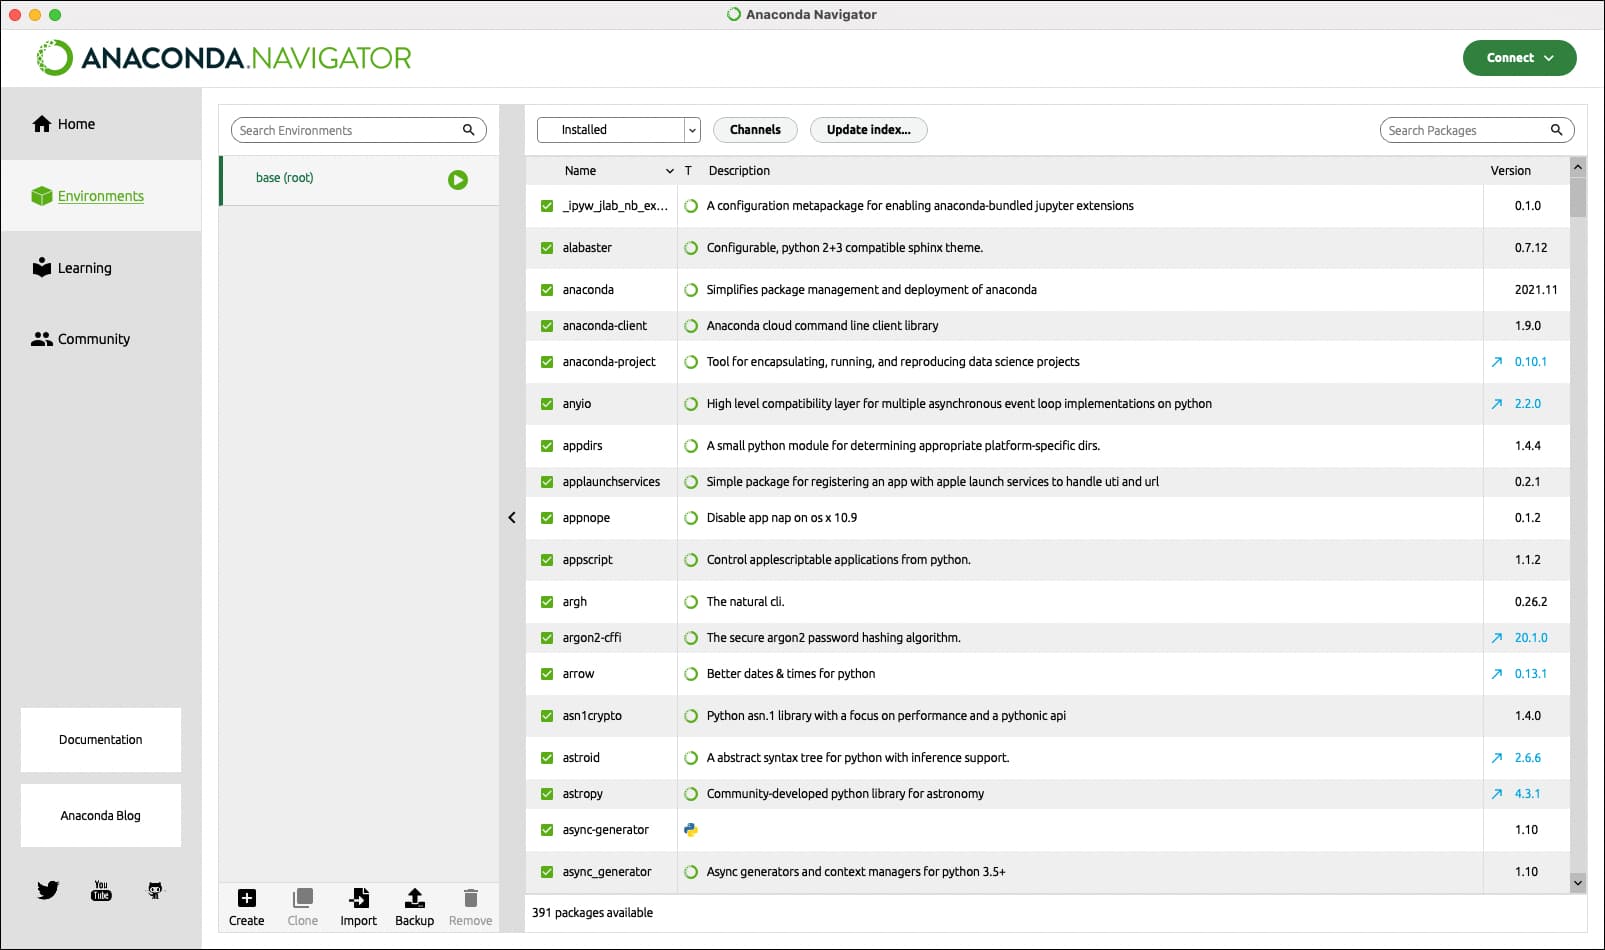
You can also create environments in Anaconda quite easily and import the different packages you need directly by searching and installing them.
How do we do it?
There are specific commands for using, activating and deactivating a virtual environment from the terminal on your machine:
| Windows | Mac OS | Linux | |
|---|---|---|---|
| Creation | $ conda create -n nom_env python=3.6 | $ mkvirtualenv nom_env | |
| Activation | $ conda activate nom_env | $ source activate nom_env | |
| Deactivation | $ deactivate | (nom_env)$ source deactivate | |
c) Text editors
If you’re working directly with .py python files for script import, for example, there are various text editors available, such as Spyder, VSCode, PyCharm, Eclipse with PyDev, and so on.
We recommend using Spyder or VSCode because they have a built-in Python kernel and a library browser, which makes it easier to check code and manipulate installed modules.
It is also possible to integrate extensions quite easily, for example for formatting code. There are Black and Flake8 for example.
If, on the other hand, you only want to use Jupyter Notebook, you can install the following formatting extensions: AutoPep8, isort, Flake8_nb…
?Related articles:


d) Organising the file
The last step before moving on to the project itself is to organise the various python files linked to the project in the same directory (where you created the virtual environment). You will need to add a requirements.txt file containing all the libraries used for documentation purposes.
How do I display all the installed packages? By using the freeze command
display pip freeze
You then need to store all these packages in a file in text format.
display pip freeze > requirements.txt
Now imagine that you want to take over a colleague’s project. To be able to run all his code, you need to install the installed packages locally. It couldn’t be simpler: you can run the following command:
display pip install -r requirements.txt
Conclusion
The aim of this article was to help you configure your production environment. You’ve done it!
You can now tackle any Machine Learning project.
If you’d like to know more about the different stages of a Machine Learning project, we’ll see you in the next article.
See you soon!