
Every frequent Excel user has had to perform repetitive tasks. Whether it’s calculating sums, formatting data or selecting cells, performing these tasks by hand can quickly become time-consuming. The best way to speed up these processes today is with macros.
To quickly define a macro, it’s a sequence of instructions that Microsoft Excel executes when asked to do so.
In this article, we’ll look at the two main ways of creating a macro in an Excel workbook:
- With the Excel recorder
- With Microsoft Excel’s dedicated programming language: Visual Basic Editor or VBA.
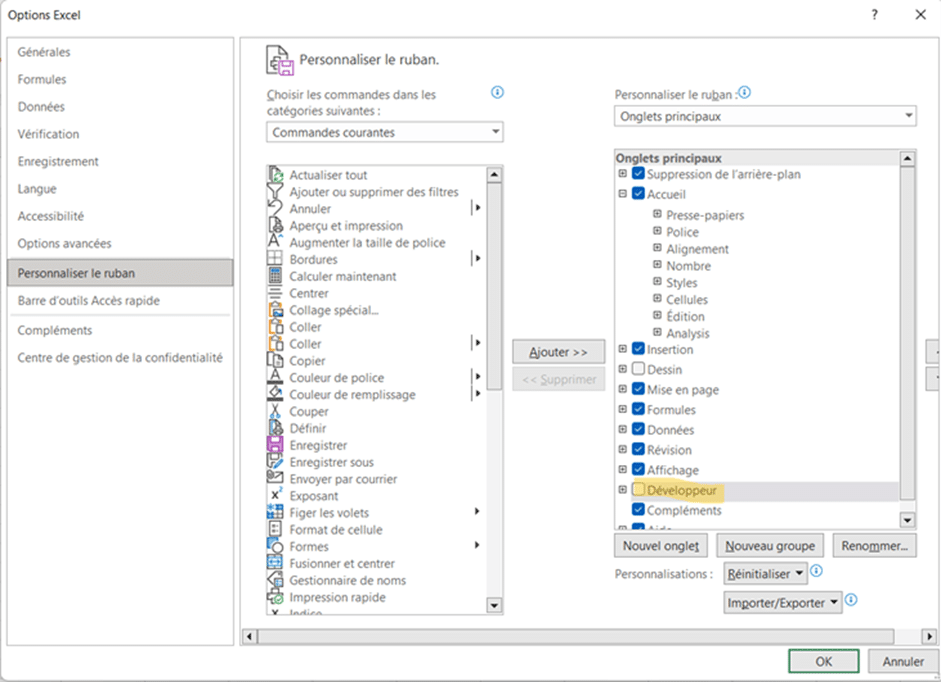
But first, it’s essential to check that the Developer tab is activated and present in the Excel Ribbon. To do this, go to File / Options / Customize Ribbon and check the Developer tab.
Related articles
Create a macro with the Excel recorder
You can now start recording a macro using the tab of the same name.
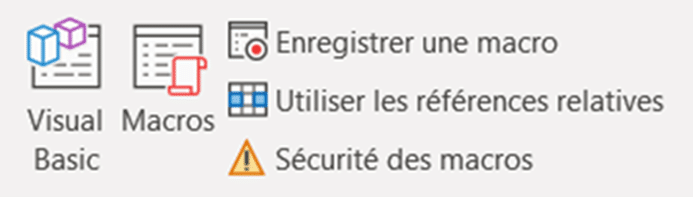
You will be asked to give your macro a name, and to choose a shortcut if you wish. Make sure your shortcut doesn’t already exist in Excel’s large bank of shortcuts. You can give it a brief description. You can also choose to save your macro in one of three folders: this workbook, a new workbook, your personal macro workbook.
This choice will depend on your use of the macro. If you wish to reuse it in other Excel workbooks, save it in your personal macro folder for quicker access.
If you’d like to learn a little more about Microsoft Excel, take a look at the training offered by Liora.